Invoice Management
Invoice Overview
To access invoice management, click on Invoices in the left sidebar menu:
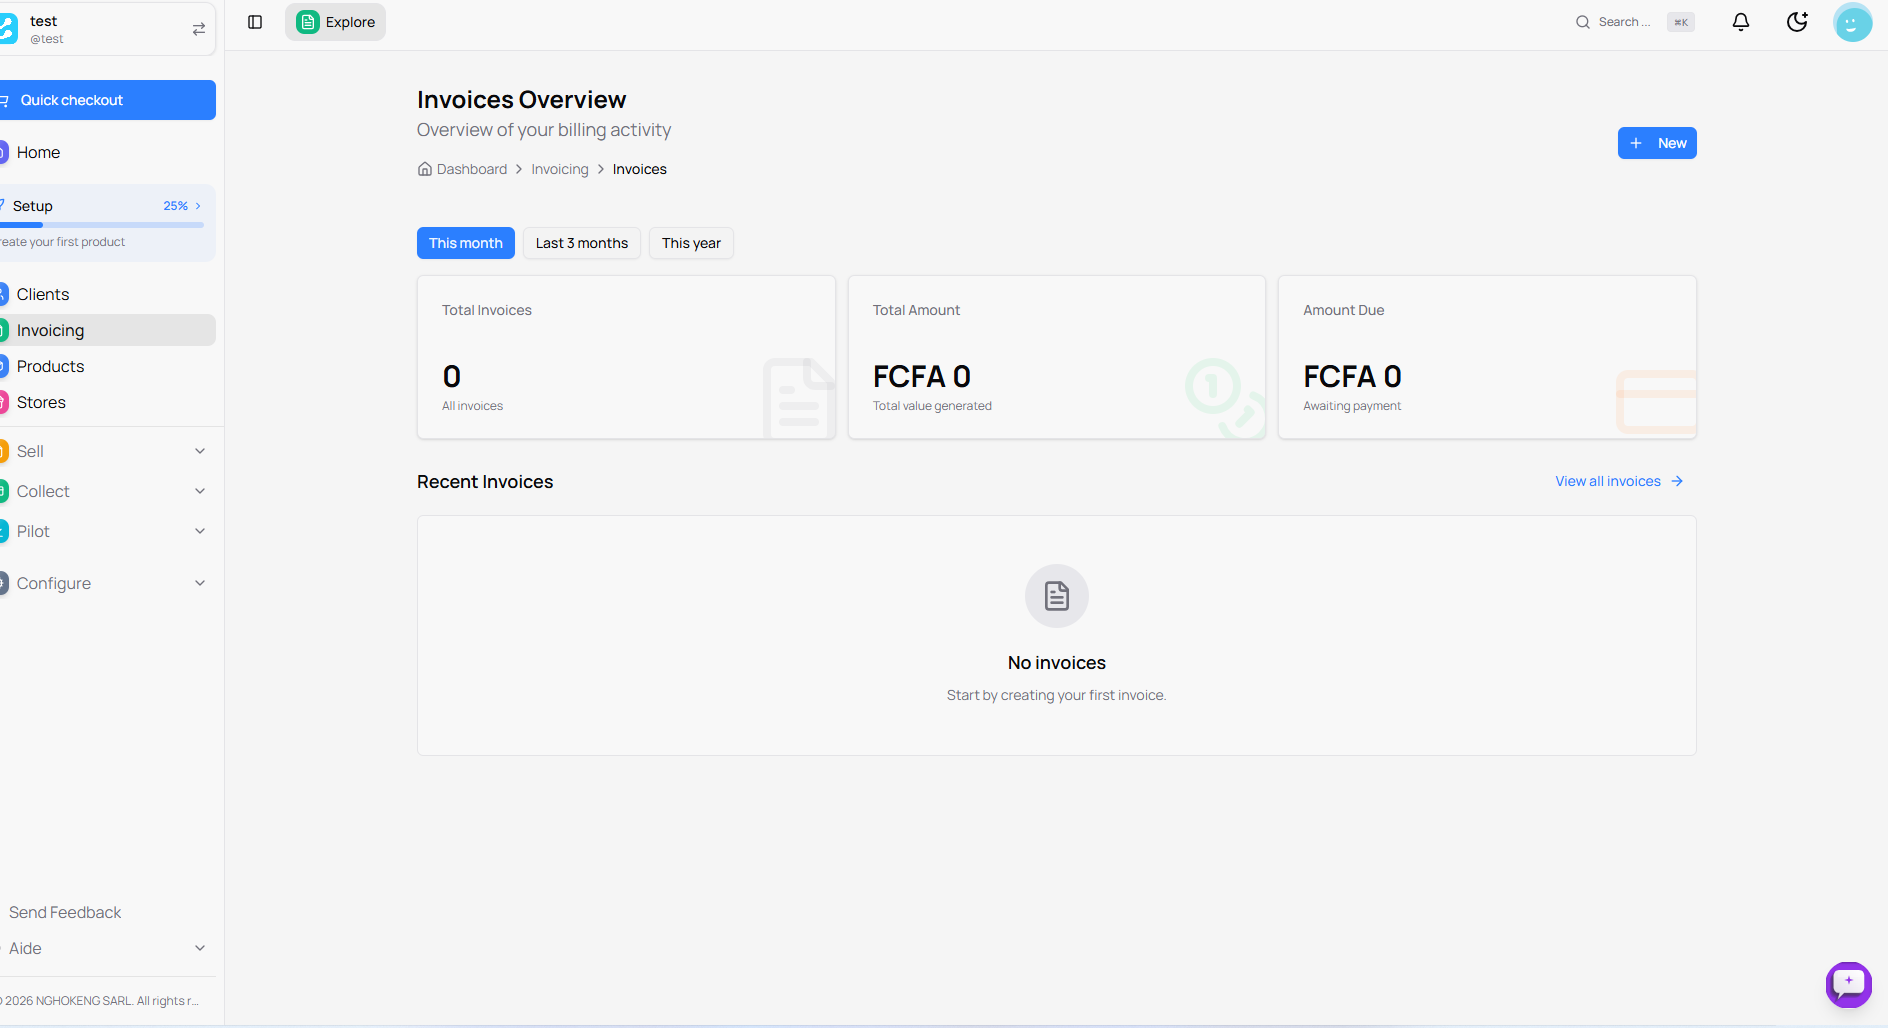
The Invoices Overview page is displayed with the following information:
At the top of the page
Period Filters Three buttons allow you to filter data:
- This month - Current month's invoices
- Last 3 months - Invoices from the last three months
- This year - Invoices from the current year
Statistics
Three cards display a summary of your billing activity:
Total Invoices
- Displays the total number of invoices created
- Example: 0 invoices
Total Amount
- Displays the total value generated by all your invoices
- Amount in FCFA
To Pay
- Displays the total amount pending payment
- Amount in FCFA
Recent Invoices
This section displays your latest created invoices. When no invoices have been created yet, a message is displayed:
- No invoices
- Start by creating your first invoice
Click See all invoices to access the complete list.
Create a New Invoice
To create an invoice, click the New button at the top right of the page:

The New invoice window opens. Fill in the basic information:
**Client ***
- Search and select a client from your list
- This field is mandatory
**Issue Date ***
- Select the invoice creation date
- Default: today's date
- This field is mandatory
Payment Terms
- Select payment conditions
- Example: "Net 30" (payment within 30 days)
Notes
- Add special notes or particular payment terms
- This field is optional
Click Create invoice to validate.
Invoice Details Page
After creating the invoice, you are automatically redirected to the invoice details page:

Invoice Header
The invoice number is generated automatically (e.g., INV-2026-0001)
Details Section
Main information is displayed:
- Invoice Number: The unique invoice number
- Status: "Draft" (invoice not yet finalized)
- Issue Date: The date the invoice was created
- Due Date: Payment deadline date
Adding Lines to the Invoice
This is where you add invoiced products or services:
Add a Line
Click the + Add a line or + Add first line button. A window opens:
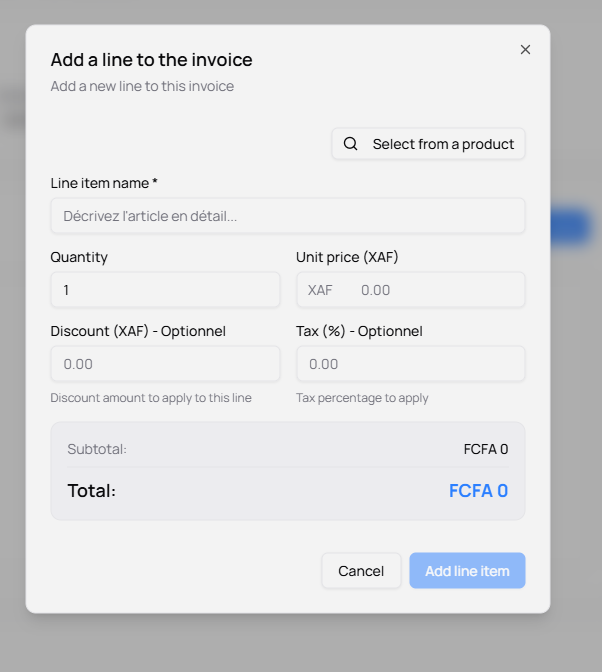
Fill in the line information:
Select from a Product
- Click this button to choose a product from your catalog
- Information (name, price) will be automatically filled
**Line Name ***
- Describe the item in detail
- This field is mandatory
- If you selected a product, the name is pre-filled
Quantity
- Indicate the product/service quantity
- Default: 1
- Example: 5, 10, 100...
Unit Price (XAF)
- Indicate the unit price in CFA francs
- If you selected a product, the price is pre-filled
- Example: 10000 XAF
Discount (XAF) - Optional
- Apply a discount on this specific line
- Amount in CFA francs
- Help text: "Discount amount to apply on this line"
Tax (%) - Optional
- Apply a tax percentage on this line
- Example: 18% for VAT
- Help text: "Tax percentage to apply"
Automatic Calculation
Subtotal and Total are automatically calculated based on the entered information:
- Subtotal = Quantity × Unit Price
- Total = Subtotal - Discount + Tax
Finalize the Line
Click Add line to add this line to the invoice, or Cancel to abort the operation.
After Adding a Line
- The line appears in the invoice lines table
- The Amount Summary on the right side updates automatically
- You can add as many lines as necessary by clicking + Add a line again
- Each line can be modified or deleted individually
Amount Summary
On the right side, the financial summary is displayed and updates automatically:
- Subtotal: Total excluding tax of all lines
- Discount: Applied reduction (if any)
- Total: Total amount including tax
- Amount paid: Sum already paid (in green)
- Remaining: Outstanding balance (in orange)
Client Information
The selected client card is displayed with:
- Client name
- Type (Individual or Company)
- A link to access the client profile
Activity
This section shows the history of actions on the invoice:
- Invoice creation
- Modifications made
- Payments received
- Sent to client
Payment List
At the bottom of the page, you can see all payments associated with this invoice:
- Search bar to filter payments
- Number of payments per page (10, 20, 50...)
Finalize and Submit the Invoice
After Adding All Lines
Once you have added all products/services and verified the amounts:
-
Verify Information
- Check the client
- Check all invoice lines
- Check totals
- Check payment terms
-
Submit the Invoice
- Click the action buttons at the top right
- Preview: To visualize the invoice before sending
- ... (three dots): To access other actions
-
Available Actions Actions change based on invoice status:
For a draft:
- Preview: View invoice
- Edit: Edit invoice
- Finalize: Transform draft into an official invoice
- Delete: Delete invoice
For a finalized invoice:
- Preview: View invoice
- Send: Send to client via email
- Download: Download as PDF
- Record Payment: Add a payment
- Duplicate: Create a copy of the invoice
-
Status Changes
- Draft → Finalized (after submission)
- Finalized → Sent (after sending to client)
- Sent → Partially Paid (after first payment)
- Partially Paid → Paid (after full payment)
Usage Tips
-
Always verify before finalizing: Once finalized, an invoice cannot be modified (except via credit note)
-
Use product catalog: To save time, select products from the catalog rather than entering everything manually
-
Add notes: Personalize your invoices with notes or specific payment conditions
-
Record payments: As the client pays, record payments to track the balance
-
Consult activity: Keep an eye on the history to follow the invoice's progress
Your invoices are now ready to be sent to your clients!