Client Management
Overview of your clients
To access client management, click on Clients in the left sidebar menu:
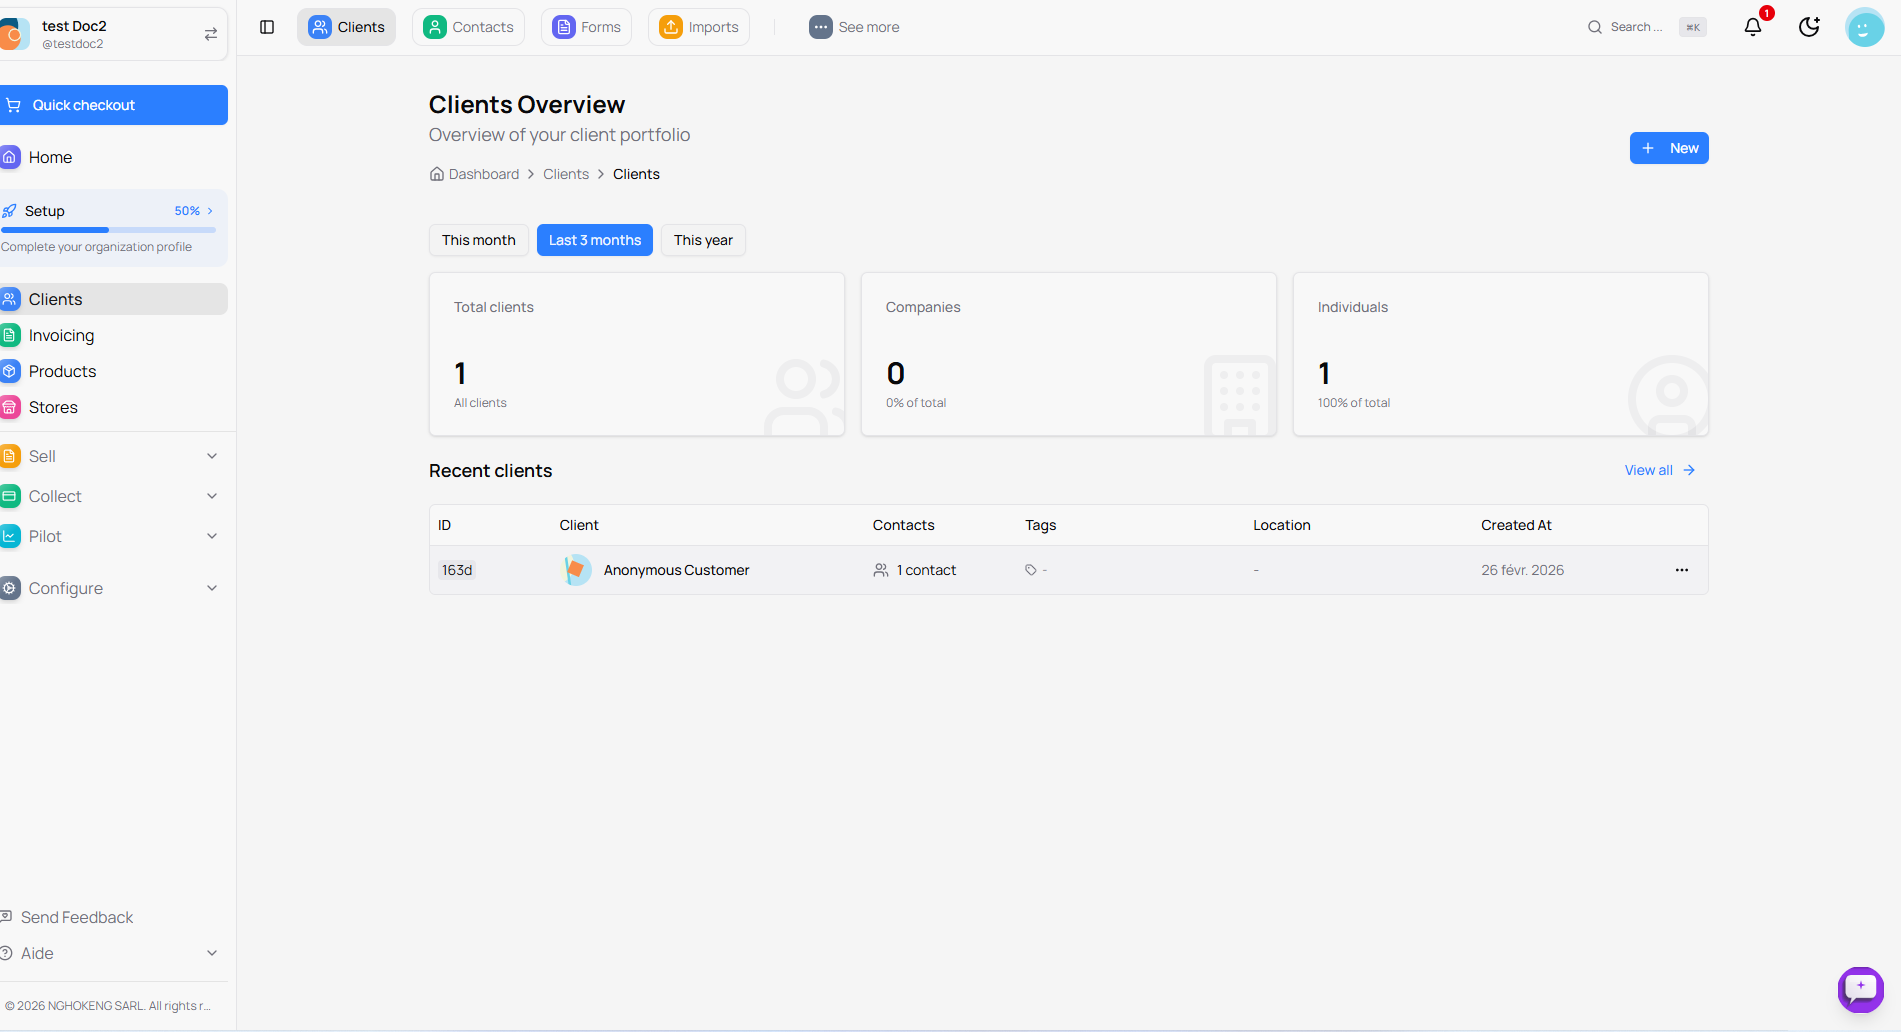
The Clients Overview page is displayed with the following information:
At the top of the page
Period Filters Three buttons allow you to filter data:
- This month - Data for the current month
- Last 3 months - Data for the last three months
- This year - Data for the current year
Statistics
Three cards display a summary of your customer portfolio:
Total Clients
- Displays the total number of clients in your database
- Example: 1 client
Companies
- Displays the number of companies (business clients)
- Percentage of total clients
Individuals
- Displays the number of individuals (private clients)
- Percentage of total clients
Recent Clients
A table displays your recently created clients with:
- ID: Unique client identifier
- Client: Client name
- Contacts: Number of associated contacts
- Tags: Labels assigned to the client
- Location: Client location
- Created On: Client creation date
Click View All to access the complete list of clients.
Create a New Client
To add a client, click the New button at the top right of the page:
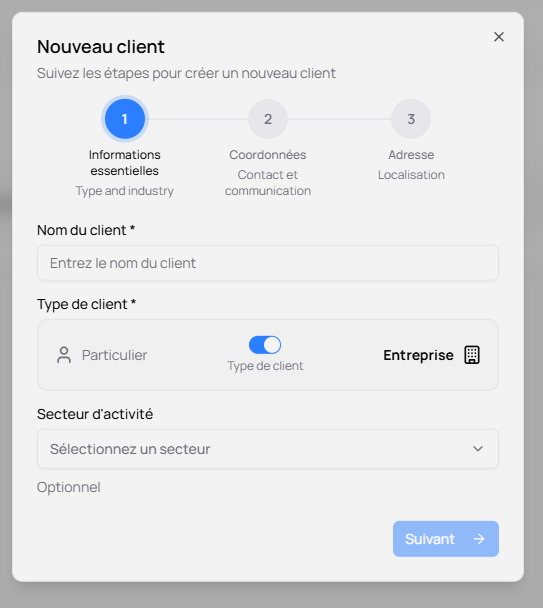
Client creation is done in 3 steps:
Step 1 - Essential Information
**Client Name ***
- Enter the client's full name
- This field is mandatory
**Client Type ***
- Select the client type using the switch:
- Individual: Private client
- Company: Business client (corporation)
Industry
- Select the client's industry sector
- This field is optional
Click Next to continue.
Step 2 - Contact Details
This step allows you to enter:
- Contact information (email, phone)
- Contact persons (for companies)
- Communication preferences
Step 3 - Address
This final step concerns:
- Full client address
- City, postal code
- Country
- Any useful location information
Once all steps are completed, click Create client to finalize.
Complete Client Management
To access the full list of all your clients, click on Clients in the menu, then on List:
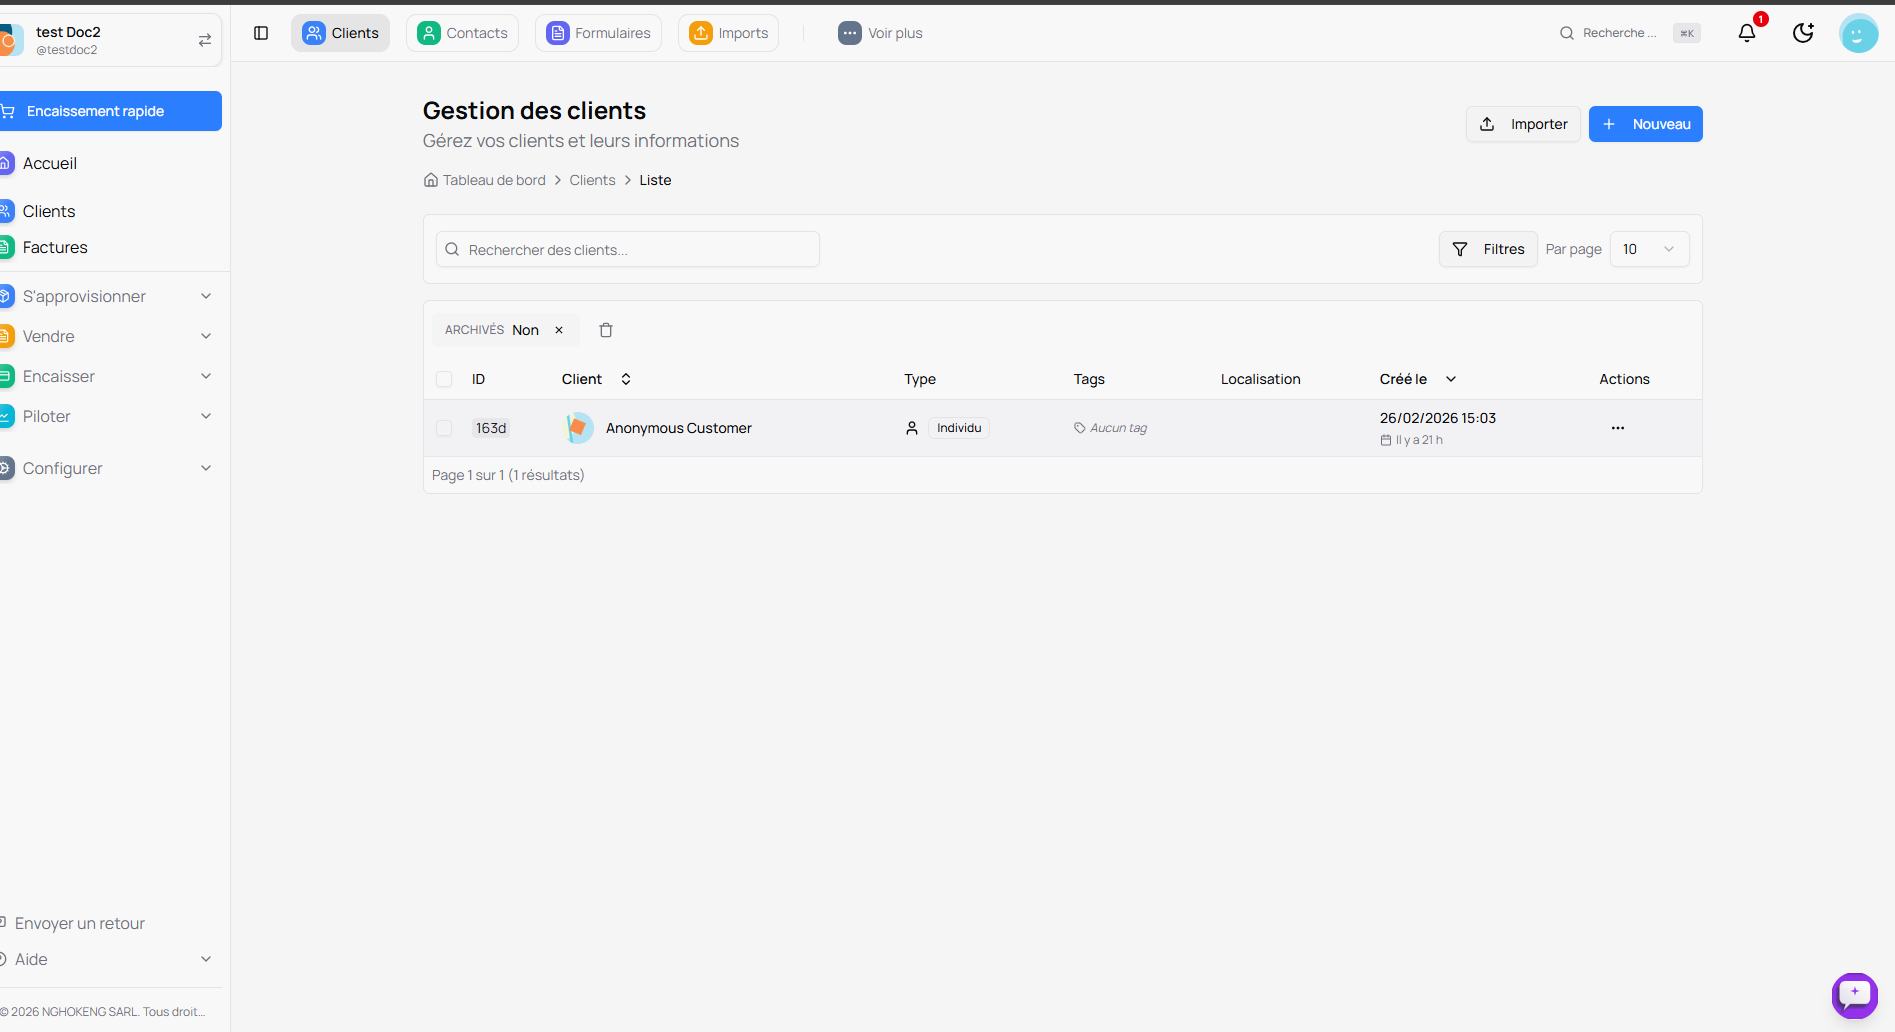
The Toolbar
At the top of the page, several options are available:
Search
- Use the Search clients... bar to quickly find a client by name
Import
- Click Import to import multiple clients at once (via an Excel or CSV file)
New
- Click New to create a new client
Filters
- Click Filters to access advanced filters
Per Page
- Choose the number of clients displayed per page (10, 20, 50, 100)
The Clients Table
The table displays the following information:
ID
- Unique client identifier
- A checkbox allows selecting multiple clients
Client
- Client name with their avatar
- An arrow allows sorting alphabetically
Type
- Indicates if the client is an Individual or a Company
Tags
- Labels assigned to the client for organization
- Example: "No tags" if no labels are defined
Location
- Client's city or region
Created On
- Date and time of client creation
- Time elapsed since creation (e.g., "20 h ago")
Actions
- Click the three dots to access actions:
- View client details
- Edit client
- Delete client
- Archive client
Archive Filter
At the top of the table, an ARCHIVED filter allows you to:
- No (default): Show only active clients
- Yes: Show only archived clients
- X: Reset the filter
Advanced Filters
To refine your client search, click the Filters button:
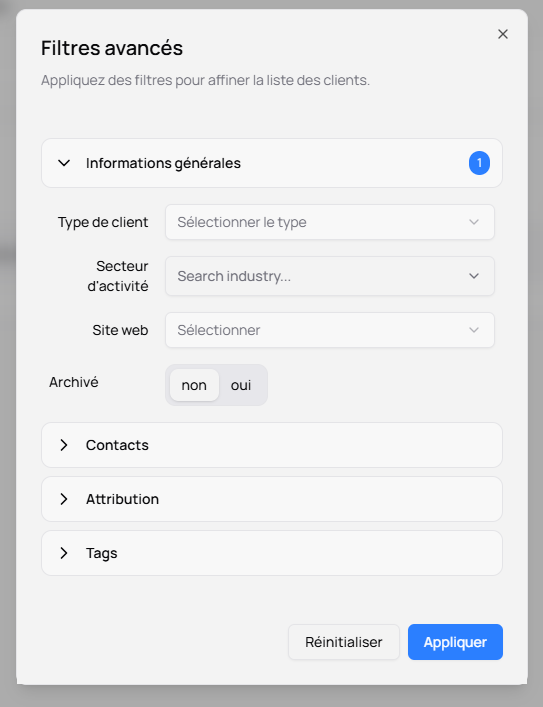
The Advanced Filters window opens with several options:
General Information
Client Type
- Select the type of client to display
- Individual or Company
Industry
- Filter by specific industry sector
- Type to search for a sector
Website
- Filter clients who have a website
Archived
- no: Active clients (default)
- yes: Archived clients
Contacts
Click the Contacts section to access contact-related filters:
- Filter by number of contacts
- Filter by contact type
Attribution
Click the Attribution section to filter by:
- User assigned to the client
- Client acquisition source
Tags
Click the Tags section to filter by:
- Specific labels assigned to clients
Apply Filters
Once your criteria are selected:
- Click Apply to see filtered results
- Click Reset to clear all filters and return to the complete list
Usage Tips
-
Organize with tags: Assign tags to your clients for better organization (e.g., "VIP", "Prospect", "Loyal")
-
Use filters: Advanced filters allow you to quickly find the desired client
-
Bulk import: If you have many clients, use the import function to save time
-
Archive inactive clients: Archive clients you no longer work with to keep a clean list
-
Check regularly: Keep an eye on your client statistics to track your portfolio's growth
Your clients are now well-organized and easy to manage!